Quick start guide
Your Fast Track to Getting Started
Welcome to Chatislav, your gateway to creating powerful, customized AI agents. This platform empowers you to transform your business knowledge into intelligent conversational experiences that can support your customers, enhance sales, and streamline operations.
Chatislav makes it simple to build AI agents that understand your specific business context by learning from your documents, websites, and other knowledge sources. Whether you're looking to provide 24/7 customer support, boost e-commerce conversions, or create a virtual concierge for your hospitality business, Chatislav provides all the tools you need in one intuitive platform.
In just five steps, you can create your chatbot. The steps outlined here are the essentials, while detailed setup information can be found in the other items in the sidebar. Start your journey today and unlock the full potential of AI to elevate your business!
Step 1: Creating Your First AI Agent
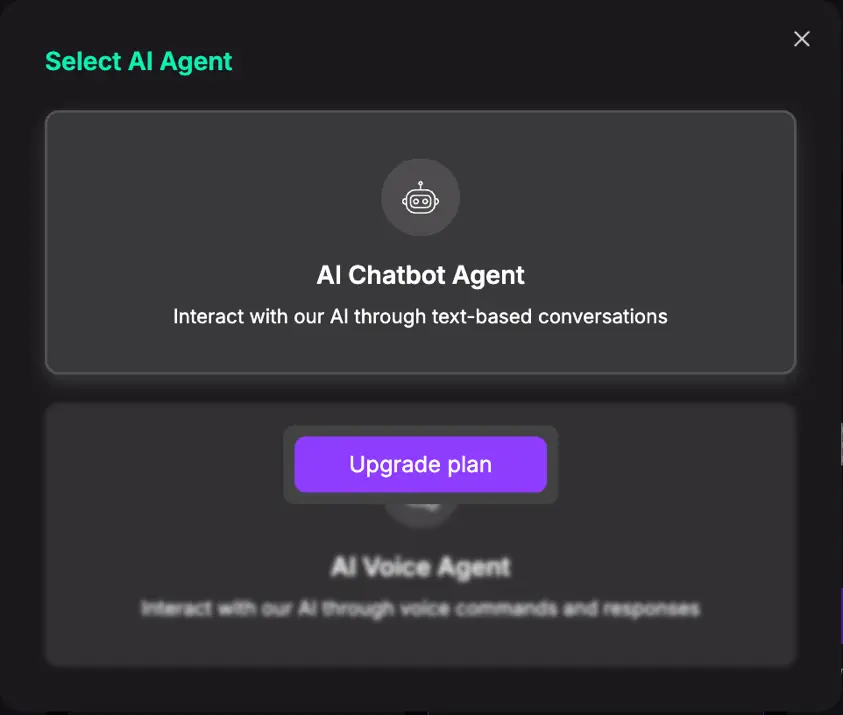
To begin creating your first AI agent, click the Create New AI Agent button in the center of the dashboard, or on the left sidebar.
Depending on the pricing plan you choose, you will have access to either the AI Chatbot Agent or the AI Voice Agent.
Name Your AI Agent:

Enter a descriptive name for your agent in the text field. Choose something that reflects its purpose and will be easily recognizable in your dashboard (e.g. "Customer Support AI Agent," "Product Recommendation Guide," or "Hotel Concierge").
Select Agent Role:
Select the primary role your AI agent will fulfill.
This helps Chatislav optimize your agent's capabilities for specific use
cases.
Step 2: Building Your Knowledge Base
The next crucial step is to provide the knowledge sources that will power your agent's responses. Chatislav offers multiple ways to train your AI with your specific content, organized into four convenient categories:
-
Document-Based Training
-
FAQ-Based Training
-
Website URL Training
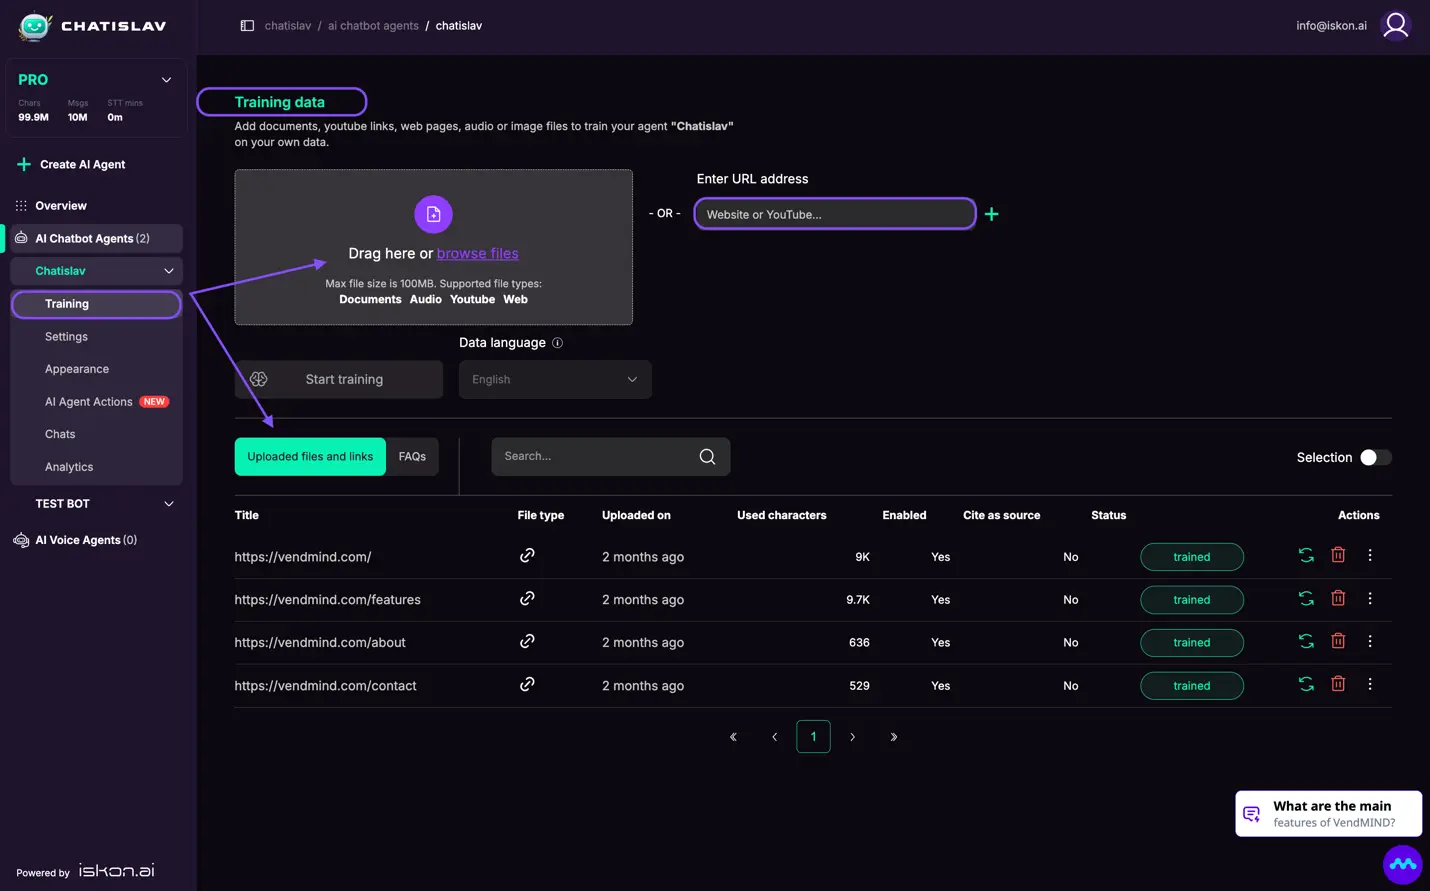
Quick example how to import PDF file for training:
- Browse for your .pdf file or drop it in the specified location:
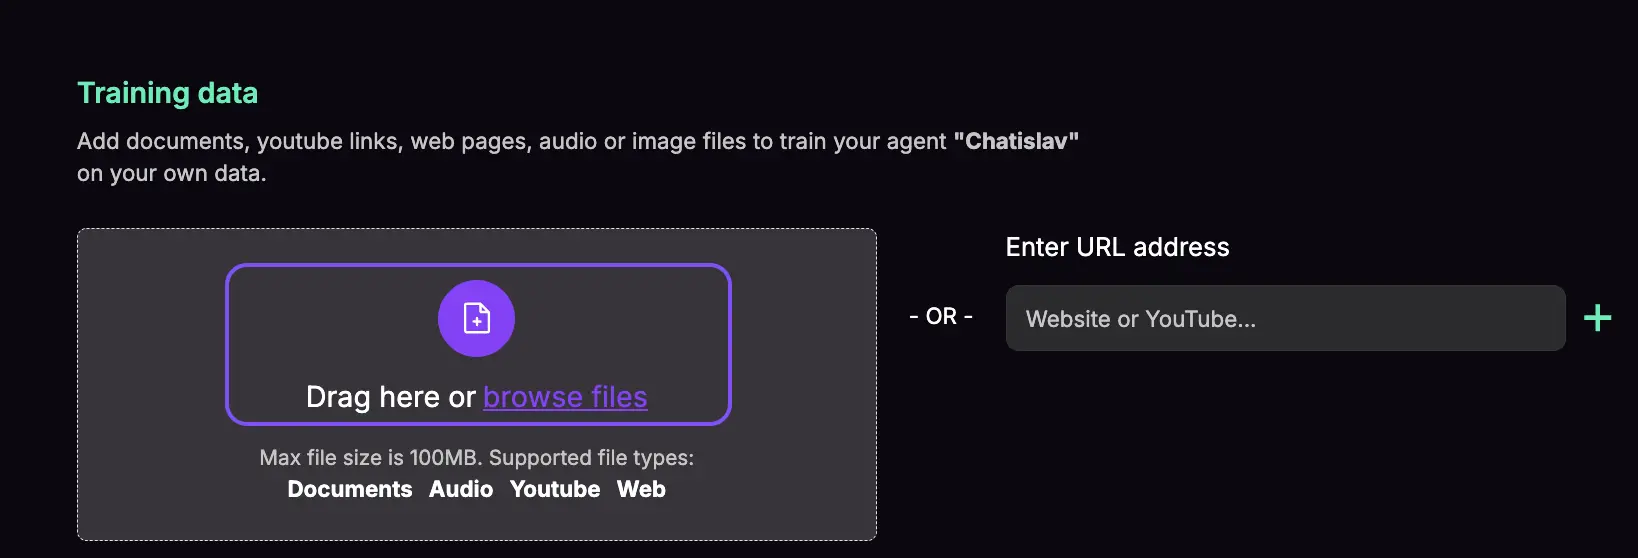
- Find the selected file:
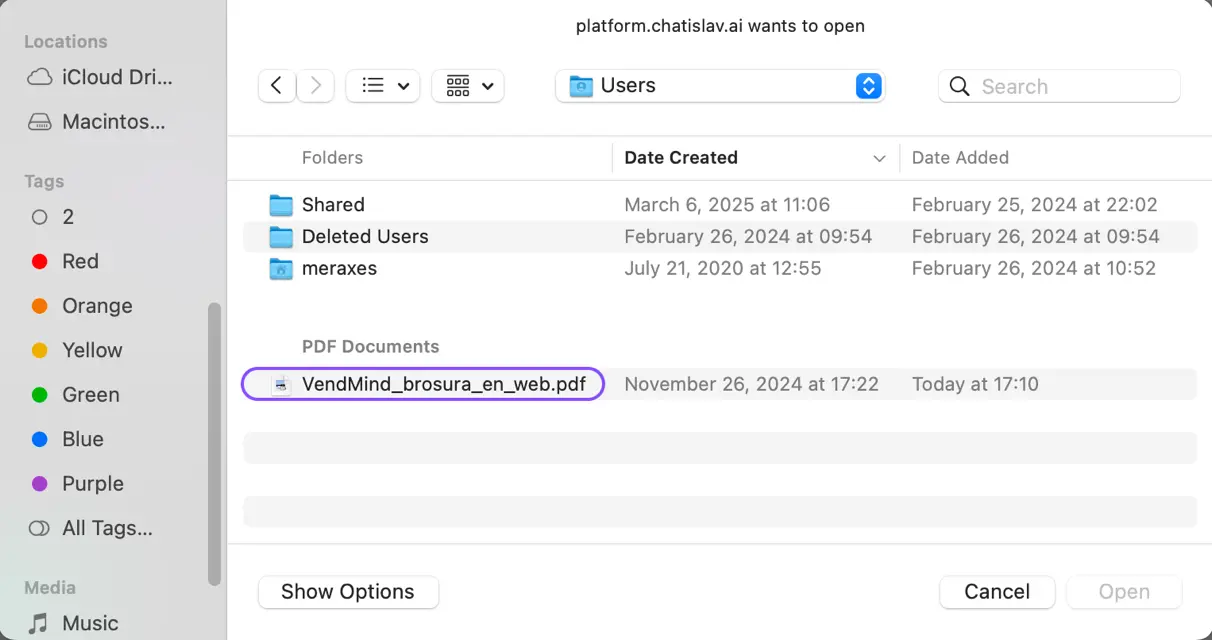
- The file will become visible in the box:
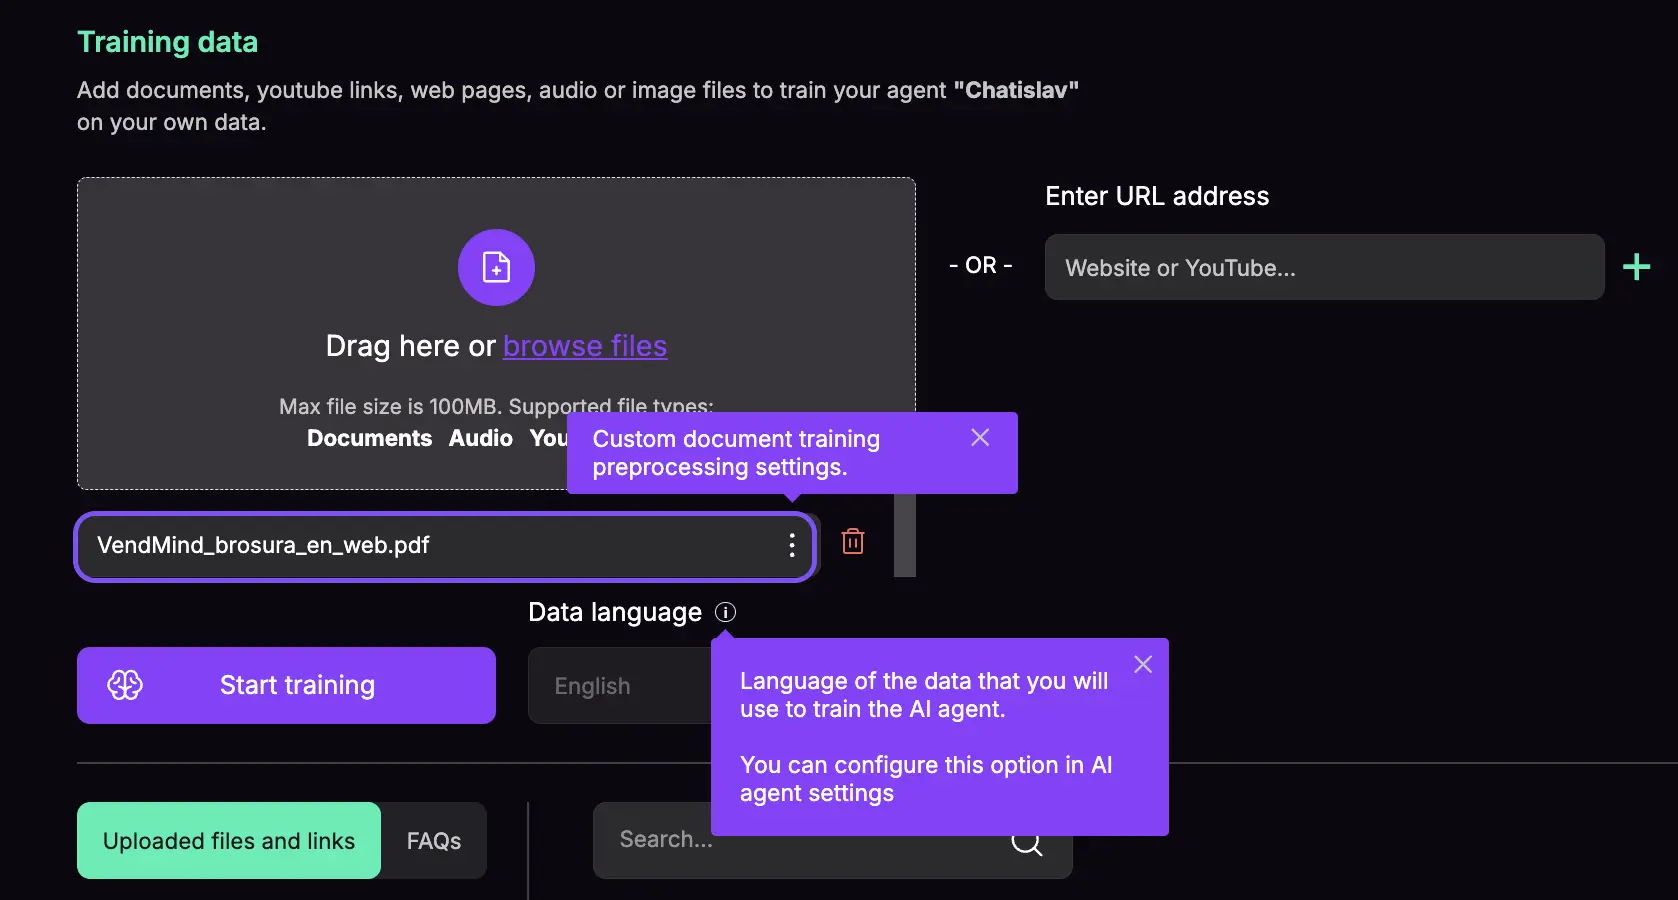
- Once you have clicked on the „Start Training“ button, you will see that the .pdf file is being processed and has the status "In progress".

- When the training is complete, you will see the status "Trained".

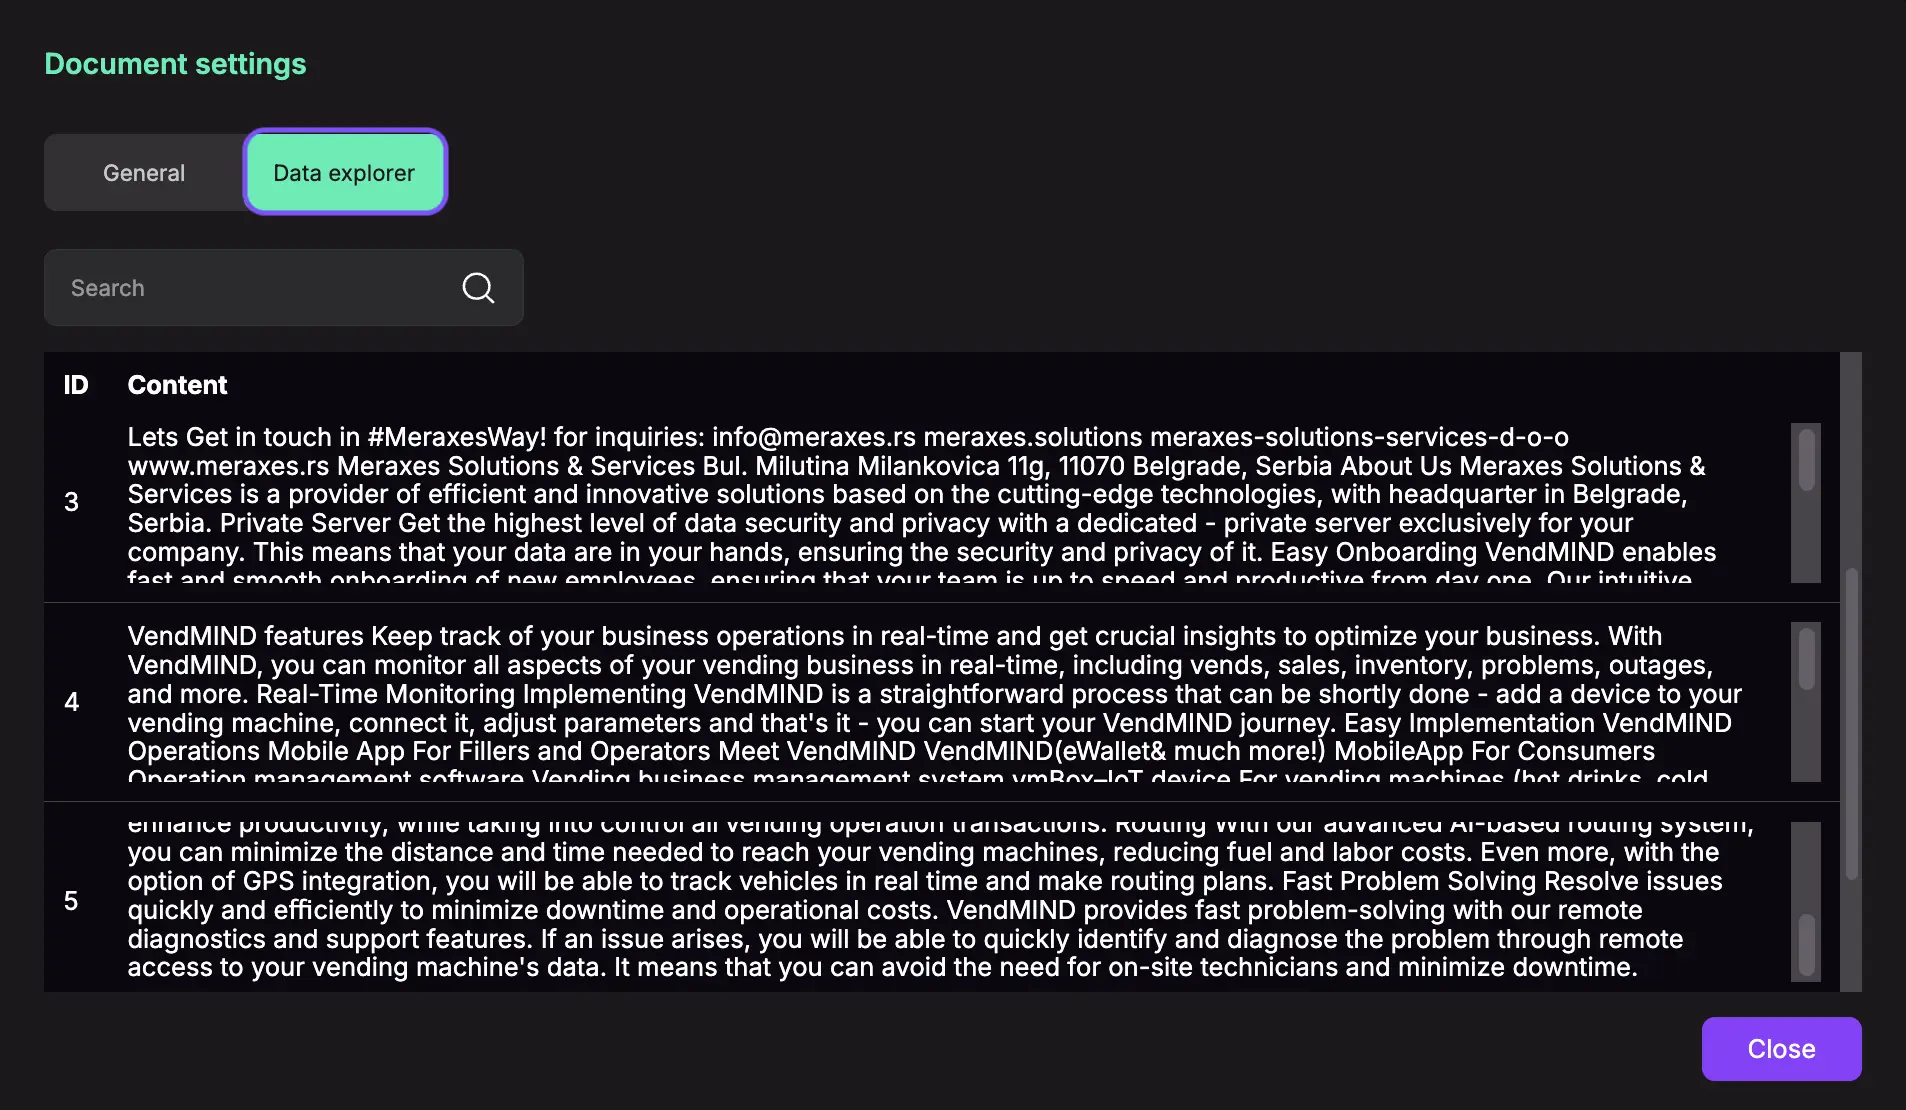
- Check if your documents are formated and trained correctly

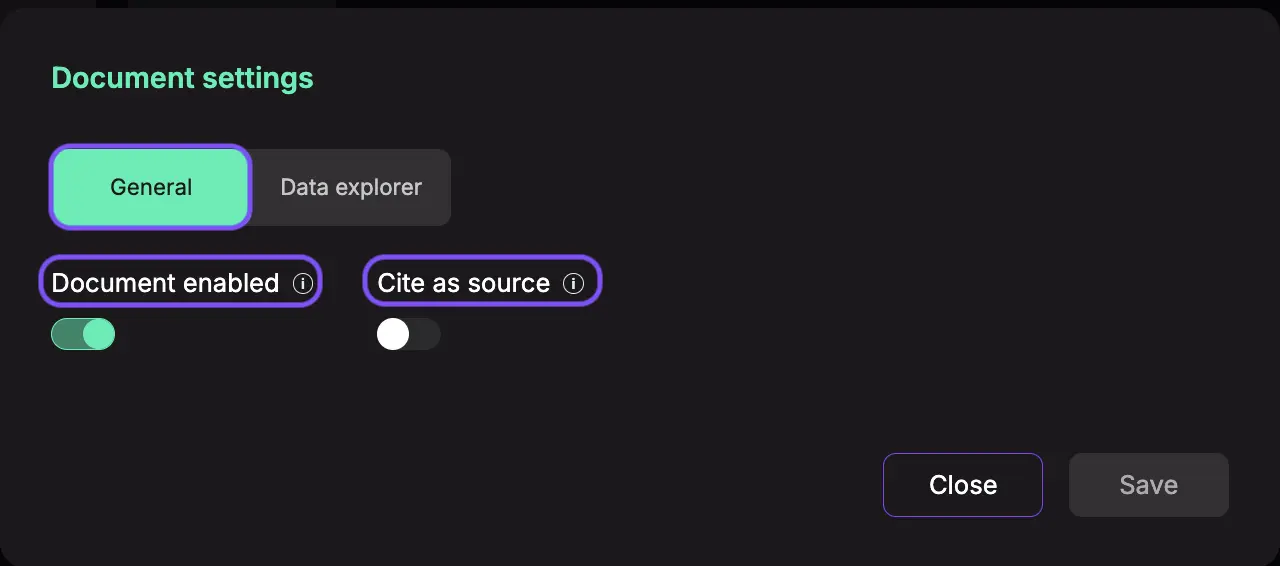
Document Settings:
Enable or Disable Document: This setting allows you to control whether the AI chatbot agent can use this document to generate responses.
Cite Document as a Source: You can choose to allow this document to be cited as a source in the AI chatbot agent's responses, enhancing the credibility of the information provided.
Explore Your Data
Step 3: Customizing Your AI Agent's Appearance

Now,it's time to personalize how your AI agent looks.
Chatislav provides comprehensive customization options to ensure your agent aligns perfectly with your brand identity.
Step 4: Test AI Agent
Once you've chosen your knowledge sources—such as Document-Based Training, FAQ-Based Training, Website URL Training, or YouTube Content Training - and after entering the file and defining the appearance, logo, position, and opening sentences for the communication window, it's time to test the chat agent. Feel free to experiment with various settings until you’re satisfied with the look and feel of your bot.
You can always return to add new documents or adjust the processing methods to better suit your needs. This flexibility ensures that your Chatislav chatbot evolves alongside your business, delivering an optimal experience for your users.

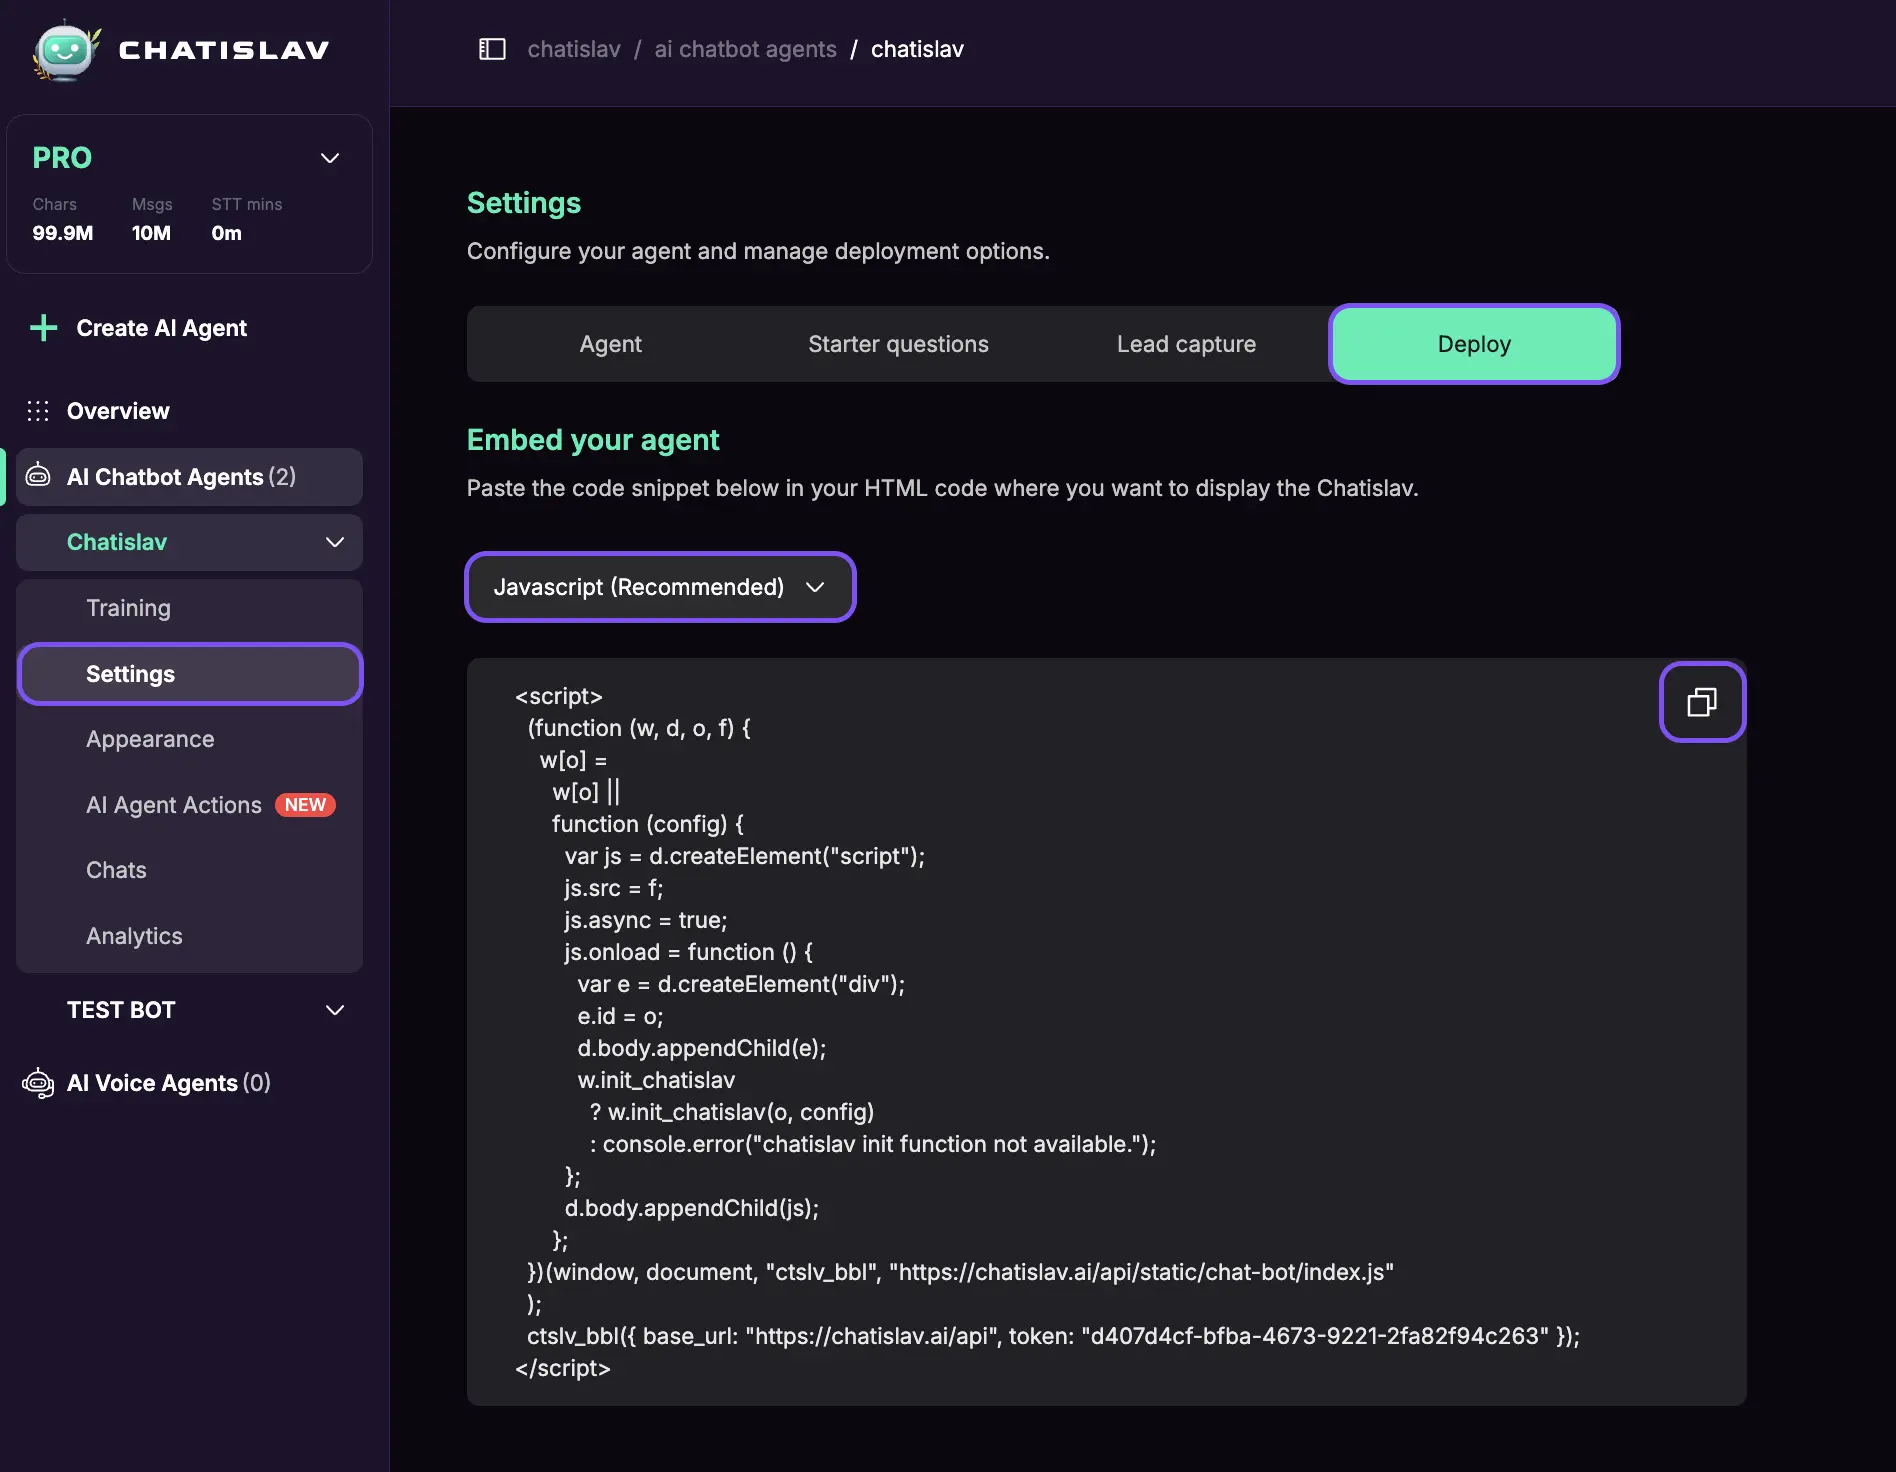
Step 5: Embedding Your AI Agent on Your Website
The final step is to deploy it to your website where it can begin assisting your visitors. Chatislav makes this process straightforward with ready-to-use code snippets.
Navigate to the "Settings" on the left slider, and than select "Deploy" tab to view embedding options:
-
JavaScript Integration (Recommended)
-
iFrame Integration
Implementation Steps
-
Select your preferred integration method (JavaScript or iFrame)
-
Click the copy icon next to the code snippet to copy it to your clipboard
-
Access your website's HTML code through your content management system or directly via FTP
-
Locate the section where you want the AI agent to appear (typically before the closing </body>
tag for site-wide implementation) -
Paste the code snippet into your HTML
-
Save the changes and publish your updated website
Verification
After embedding your AI agent:
-
Visit your website as a regular user would
-
Verify that the AI agent appears correctly
-
Test several interactions to ensure it's working as expected
That’s all it takes! These are the essential steps to set up your Chatislav chatbot. For detailed information on configurations and advanced settings, be sure to check the sidebar.
With just a few clicks, your personal Chatislav bot is ready to step into its role, providing intelligent support and engaging conversations tailored to your needs.
Embrace the future of customer interaction with your very own AI agent!